Looking for the perfect dessert that’s both rich and fruity? This recipe for cherry cheesecake combines a sweet, tart cherry topping with a smooth, velvety cheesecake filling. Whether you’re making it for a special occasion or just to indulge in a sweet treat, this cheesecake is sure to impress. With a graham cracker crust, creamy filling, and a vibrant cherry topping, this recipe is simple yet sophisticated and will quickly become your go-to cheesecake.
Let’s dive into how to make this delicious dessert that combines the best of creamy cheesecake and fresh, juicy cherries.
Table of contents
- Why You’ll Love This Cherry Cheesecake Recipe
- Ingredients for Cherry Cheesecake Recipe
- How to Make Cherry Cheesecake Recipe
- Tips for Perfect Cherry Cheesecake Recipe
- Serving Cherry Cheesecake Recipe
- Storing and Reheating Cherry Cheesecake Recipe
- Frequently Asked Questions About Cherry Cheesecake Recipe
- Conclusion
Why You’ll Love This Cherry Cheesecake Recipe
This cherry cheesecake recipe is a dessert that combines the richness of cheesecake with the sweetness and tartness of cherries, creating the perfect balance of flavors. Here’s why you’ll fall in love with this recipe:
1. A Perfect Combination of Creamy and Fruity
The smooth and creamy texture of the cheesecake pairs perfectly with the sweet-tart flavor of the cherry topping. This cherry cheesecake offers a luscious contrast between the rich filling and the juicy, vibrant fruit, making every bite irresistible.
2. Simple and Easy to Make
Don’t be intimidated by the idea of making cheesecake. This recipe is straightforward and easy to follow. The graham cracker crust is simple to prepare, and the filling comes together in no time. With just a few basic ingredients, you can create a show-stopping dessert that looks and tastes like it came from a bakery.
3. Customizable for Any Occasion
This cheesecake is versatile. Whether you’re using fresh cherries, cherry pie filling, or even a chocolate drizzle, you can customize the flavor and presentation to suit your tastes or the occasion. Serve it for birthdays, holidays, or a casual family dinner—it’s always a crowd-pleaser!
4. No Baking Water Bath Required
Unlike many cheesecake recipes, this cherry cheesecake doesn’t require a water bath, making it much simpler to prepare. Just bake the crust and filling, then chill it in the fridge to set. No fuss, no cracks—just perfect cheesecake every time.
5. A Beautiful, Colorful Dessert
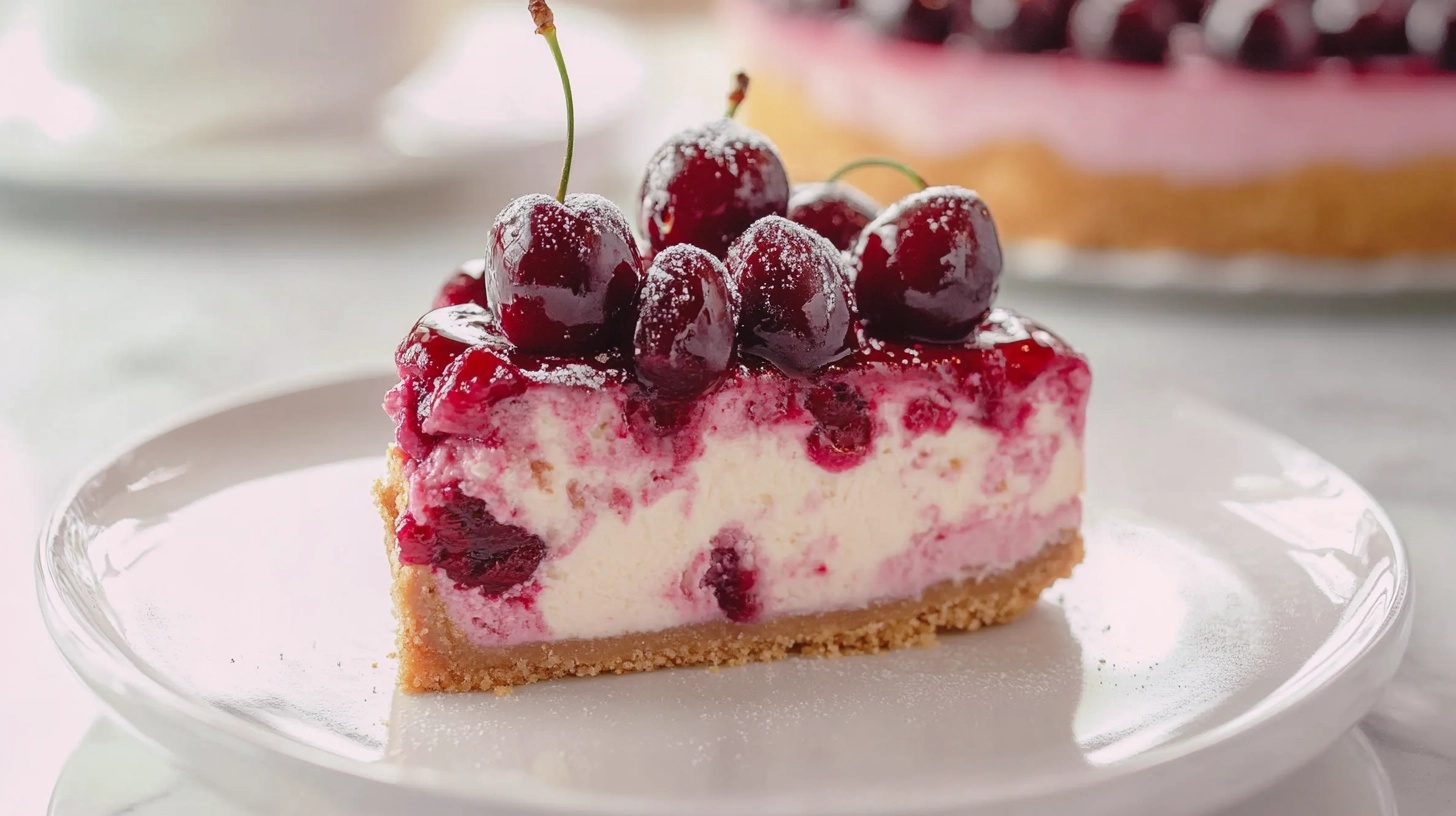
The cherry topping not only adds a burst of flavor but also gives the cheesecake a gorgeous, vibrant color. The contrast of the deep red cherries against the creamy white filling makes this cheesecake as beautiful to look at as it is to eat.
6. Ideal for Meal Prep or Make-Ahead Desserts
This cherry cheesecake is perfect for preparing in advance. You can make it the day before and let it chill in the fridge overnight, allowing the flavors to meld and the cheesecake to set to perfection. Plus, leftovers (if there are any!) are just as delicious the next day.
Ingredients for Cherry Cheesecake Recipe
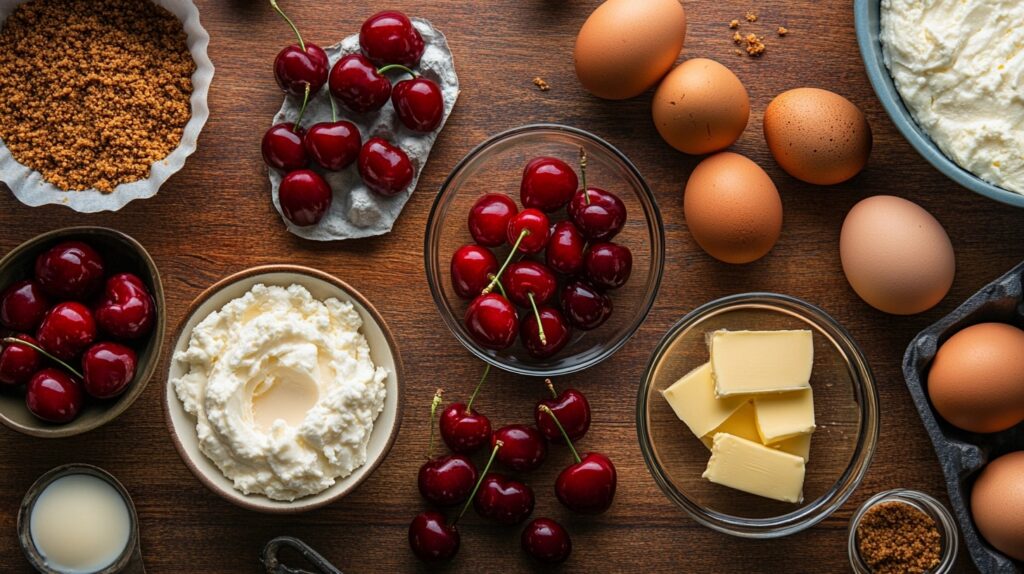
To make this cherry cheesecake recipe, you’ll need a few basic ingredients to create the rich, creamy filling, flavorful crust, and sweet cherry topping. Here’s what you’ll need:
| Ingredient | Quantity | Purpose |
|---|---|---|
| Cream cheese | 2 (8 oz) blocks | Provides the rich and creamy base for the cheesecake. |
| Sour cream | 1 cup | Adds tanginess and creaminess to the filling. |
| Granulated sugar | 1 cup | Sweetens the cheesecake filling. |
| Eggs | 3 large | Binds the cheesecake together. |
| Graham cracker crumbs | 1 ½ cups | Forms the base of the crust. |
| Butter | ½ cup | Adds richness to the crust and helps bind the crumbs. |
| Cherry pie filling | 1 can (21 oz) | Adds the sweet cherry topping for the cheesecake. |
| Heavy cream | 1 cup | Adds richness and smooth texture to the filling. |
| Vanilla extract | 1 tsp | Adds depth of flavor to the filling. |

Ingredient Notes
- Cream Cheese:
Make sure to use full-fat cream cheese for the best texture and flavor. Allow it to come to room temperature before mixing to avoid lumps in the filling. - Sour Cream:
Sour cream gives the cheesecake a slightly tangy flavor that balances out the sweetness. You can use Greek yogurt as a lighter alternative. - Cherry Pie Filling:
Cherry pie filling makes this cheesecake easy and convenient, but if you’re looking for a fresher option, you can use fresh cherries or make your own cherry topping by cooking fresh cherries with sugar. - Graham Cracker Crumbs:
The graham cracker crust gives a sweet, crunchy base for the creamy filling. You can substitute it with chocolate cookie crumbs or a nut crust if you prefer a different flavor. - Heavy Cream:
Heavy cream gives the cheesecake its smooth, velvety texture. Be sure to use full-fat cream for the best results.
How to Make Cherry Cheesecake Recipe
Making cherry cheesecake recipe is easier than it looks! With just a few simple steps, you’ll be able to enjoy this creamy, fruity dessert. Here’s how to make it:
Step-by-Step Instructions for Cherry Cheesecake Recipe
1. Prepare the Crust
- Preheat your oven to 325°F (163°C).
- In a medium-sized bowl, combine graham cracker crumbs, melted butter, and granulated sugar. Stir until the mixture is well combined.
- Press the mixture into the bottom of a 9-inch springform pan, making sure the crust is evenly distributed. Press it down firmly.
- Bake the crust for about 8-10 minutes until golden brown. When finished, take it out of the oven and allow it to cool.
2. Make the Cheesecake Filling
- In a large bowl, beat together cream cheese, sour cream, and granulated sugar using a hand mixer or stand mixer until smooth and creamy.
- One by one, add the eggs, thoroughly mixing each time.
- Stir in heavy cream and vanilla extract. Mix until fully combined and smooth.
- Cover the cooled graham cracker crust in the springform pan with the cheesecake filling. Use a spatula to smooth the top.
3. Bake the Cheesecake
- Bake the cheesecake in the preheated oven at 325°F (163°C) for about 50-60 minutes, or until the center is set but still slightly jiggly. The edges should be firm, but the center will be slightly soft.
- After turning off the oven, slightly open the door. Let the cheesecake cool in the oven for 1 hour to avoid cracks.
- After the hour, remove the cheesecake from the oven and let it cool completely at room temperature. Then, transfer it to the fridge and chill for at least 4 hours, or overnight for the best results.
4. Add the Cherry Topping
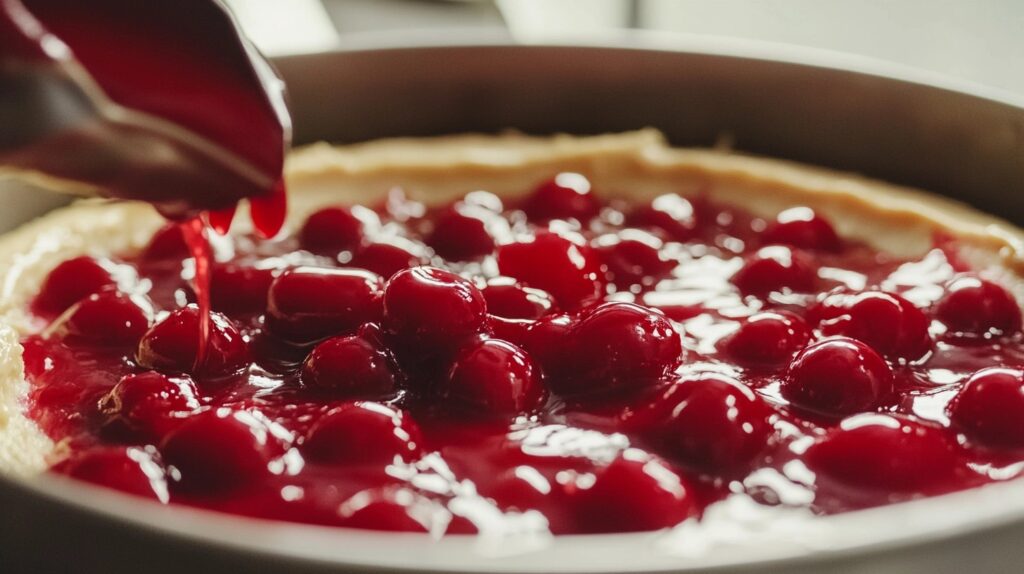
- Once the cheesecake has chilled and set, spread the cherry pie filling (or fresh cherries) evenly over the top of the cheesecake.
- You can drizzle some of the juice from the pie filling on top to add extra cherry flavor.

Tips for Perfect Cherry Cheesecake Recipe
To ensure your cherry cheesecake recipe turns out perfectly creamy and delicious, here are some tips to help you every step of the way:
1. Use Room Temperature Ingredients
For the smoothest, lump-free filling, make sure your cream cheese, sour cream, and eggs are at room temperature. This will help the ingredients blend together seamlessly and give the cheesecake its perfect texture.
2. Don’t Overmix the Filling
When mixing the ingredients for the cheesecake filling, be careful not to overmix, especially after adding the eggs. Overmixing can introduce too much air into the batter, which can cause cracks when baking. Mix just until everything is combined for a smooth filling.
3. Avoiding Cracks in Your Cherry Cheesecake
To avoid cracks in the cheesecake, let it cool gradually in the oven after baking. After turning off the oven, leave the door slightly open for 1 hour. This gentle cooling process helps the cheesecake set evenly and reduces the chances of cracks forming.
4. Bake in a Water Bath
For an even smoother texture, consider baking the cheesecake in a water bath. Wrap the bottom of the springform pan in aluminum foil to prevent leaks, and place it in a larger pan filled with hot water (about halfway up the sides of the cheesecake pan). This helps the cheesecake bake evenly and reduces the risk of cracks.
5. Chill the Cheesecake Overnight
For the best flavor and texture, let the cheesecake chill in the fridge for at least 4 hours, but preferably overnight. This gives the cheesecake time to fully set and allows the flavors to meld together.
6. Use Fresh or Canned Cherries
You can use either fresh cherries or cherry pie filling for the topping. If using fresh cherries, simply cook them down with some sugar to create a syrup-like topping. If you prefer the convenience of canned filling, go for a high-quality brand for the best flavor.
7. Customize the Topping
Feel free to get creative with the topping. You can add a swirl of chocolate ganache, some crushed graham crackers, or even a drizzle of caramel sauce to make your cheesecake even more decadent.
Serving Cherry Cheesecake Recipe
Once your cherry cheesecake recipe is ready, it’s time to serve and enjoy! Here are some delicious ways to serve this creamy, fruity dessert:
1. Serve with Whipped Cream
A dollop of freshly made whipped cream pairs perfectly with the smooth cheesecake and sweet cherry topping. For an extra special touch, sprinkle some cinnamon or chocolate shavings on top of the whipped cream to enhance the flavor.
2. Pair with Fresh Fruit
Fresh fruit adds a refreshing contrast to the richness of the cheesecake. Besides cherries, strawberries, blueberries, or even raspberries work wonderfully with the creamy filling. The acidity of the berries balances the sweetness of the cheesecake.
3. Drizzle with Chocolate Sauce
For a touch of indulgence, drizzle some chocolate sauce over the top of your cherry cheesecake. The combination of the rich chocolate with the tangy cherry and creamy cheesecake is absolutely irresistible.
4. Add a Crunch with Nuts
Sprinkle some toasted nuts, such as walnuts or almonds, on top of the cheesecake for added texture. The crunch pairs nicely with the smooth cheesecake and enhances the overall flavor.
5. Serve as Individual Portions
For a fun presentation, slice the cheesecake into smaller portions and serve them on individual plates. You can even add a bit of cherry syrup from the topping to each portion for a little extra flavor.
6. Make It a Mini Cheesecake
If you’re serving for a special occasion or event, consider making mini cheesecakes instead. You can use a muffin tin or individual springform pans to create smaller, single-serve cheesecakes topped with fresh cherries.
These serving suggestions will not only make your cherry cheesecake even more delicious but also enhance the overall presentation. Whether you’re serving it for a casual meal or a special gathering, this cheesecake is sure to impress!
Storing and Reheating Cherry Cheesecake Recipe
If you have leftovers or want to prepare your cherry cheesecake recipe ahead of time, here’s how to store and reheat it so it stays fresh and delicious:
1. Short-Term Storage for Cherry Cheesecake
Refrigeration
- How to Store:
After the cherry cheesecake has cooled completely, cover it with plastic wrap or transfer it to an airtight container to keep it fresh. - Shelf Life:
When properly stored, cherry cheesecake will stay fresh in the refrigerator for up to 5 days. - Pro Tip:
If you’ve already added the cherry topping, it’s best to store the cheesecake with the topping separately to avoid sogginess. You can add the topping right before serving.
2. Freezing Cherry Cheesecake
How to Freeze
- Cool Completely:
Allow the cherry cheesecake to cool to room temperature before freezing. This helps prevent excess moisture and freezer burn. - Wrap Properly:
Wrap the cheesecake tightly in plastic wrap, then in aluminum foil, or place it in a freezer-safe container to protect it. - Freezing Time:
You can freeze the cheesecake for up to two months. - Label and Date:
Don’t forget to label the cheesecake with the date so you know when it was frozen.
3. Reheating Cherry Cheesecake
Microwave
- How to Reheat:
Place a slice of cherry cheesecake in a microwave-safe dish and cover it with a damp paper towel to keep it moist. Heat on low power for 30-40 seconds or until warmed through. - Pro Tip:
If you’ve stored the cheesecake with the cherry topping, warm it first and then add fresh topping just before serving to maintain its texture.
Oven
- How to Reheat:
Preheat your oven to 300°F (150°C). Place the cheesecake in the oven and cover it loosely with aluminum foil to prevent it from drying out. Heat for about 10-15 minutes, or until warmed through. - Pro Tip:
After reheating, you can refresh the topping by adding more cherry filling or a drizzle of cherry syrup for extra flavor.
4. Keep the Sauce Fresh
If you have leftover cherry topping or cherry syrup, store them separately in the refrigerator for up to 5 days. You can also freeze the topping in small portions for up to 2 months. Just thaw before serving.
Frequently Asked Questions About Cherry Cheesecake Recipe
What is the Difference Between New York Cheesecake and Classic Cheesecake?
The primary difference between New York cheesecake and classic cheesecake lies in the ingredients and texture:
- New York cheesecake is typically denser and creamier because it’s made with a higher ratio of cream cheese and often includes heavy cream or sour cream in the filling.
- Classic cheesecake may use a lighter filling, typically with cream cheese and sour cream, but it often has a fluffier texture and may have more of a balanced sweetness.
Both styles are rich, but New York cheesecake is known for its signature creamy, dense texture, while classic cheesecake is a bit lighter and airier.
What Does Adding an Extra Egg to Cheesecake Do?
Adding an extra egg to cheesecake can have a few effects:
- Richness: It makes the filling denser and more cohesive by adding more structure.
- Firmness: An additional egg can help the cheesecake set more firmly, reducing the risk of cracks when baking.
- Slightly Creamier Texture: If you don’t overmix, the extra egg can contribute to a smoother and creamier texture, especially if you’re aiming for a New York-style cheesecake.
What Are the Three Types of Cheesecake?
There are several different styles of cheesecake, but here are three of the most popular:
- New York Cheesecake: Known for its dense and creamy texture, this cheesecake uses a high proportion of cream cheese and often includes sour cream in the filling.
- Chicago-Style Cheesecake: Typically features a buttery, rich, and crumbly cookie crust, and the filling is often made with a combination of cream cheese and mascarpone for an even richer texture.
- No-Bake Cheesecake: This cheesecake skips the baking step and is typically set in the fridge, using gelatin or whipped cream to achieve a light, mousse-like texture.
Is Sour Cream or Whipping Cream Better for Cheesecake?
Both sour cream and whipping cream are commonly used in cheesecake, but they serve different purposes:
- Sour cream is often added to the filling for tanginess and creaminess, which balances out the sweetness of the cheesecake and adds a bit of sharpness. It’s commonly used in New York-style cheesecakes for a richer, more complex flavor.
- Whipping cream is used to lighten the texture of the cheesecake, making it fluffier. It’s especially useful in no-bake cheesecakes or when you want to make the filling creamier without adding tang.
In most classic cheesecake recipes, sour cream is preferred, but you can use both depending on the desired outcome.
Conclusion
There’s no doubt that cherry cheesecake is a dessert everyone will love. The combination of creamy cheesecake filling, a sweet graham cracker crust, and a vibrant cherry topping makes for a treat that’s both indulgent and refreshing. Whether you’re serving it for a special occasion or just because, this dessert is sure to become a favorite in your recipe repertoire.
By following this simple recipe, using the tips and tricks provided, and customizing the toppings, you’ll be able to create a cheesecake that’s just as impressive as it is delicious. Don’t forget to store leftovers properly to enjoy this sweet treat for days to come!

